Please review these critical points to ensure a successful installation:
Surface temperature must be between 60-80°F (15-27°C)
Clean and degrease the surface thoroughly before application
Work in a dust-free environment to prevent contamination
Allow 24-48 hours for full adhesion before cleaning
Use proper tools that were provided/li>
1 Surface Preparation
Proper surface preparation is crucial for a successful installation. Clean the area thoroughly with isopropyl alcohol and ensure it's completely dry.
Required Materials:
Isopropyl alcohol (70% or higher)
Microfiber towels
Lint-free cleaning cloth
2 Video Tutorials
Watch our detailed installation videos for each component.
Center Console 2.0
Installation Guide
Center Console 1.0
Installation Guide
Maintenance & Care
Keep your installation looking great for years
Cleaning Instructions
Wipe with damp microfiber cloth
Use mild interior cleaner if needed
Avoid harsh chemicals or solvents
Do not use excessive water
Long-term Care
Avoid placing sharp objects on wrapped surfaces
Use UV protectant spray for sun-exposed areas
Inspect edges periodically
Re-adhere any lifting edges promptly
Common Issues & Solutions
Vinyl Wrap Installation Troubleshooting
Expert solutions for common vinyl wrap installation challenges with video tutorials
ℹ️
Wrinkles & Fingers
How to fix wrinkled edges fast
ℹ
What Causes Wrinkles: When vinyl runs across a deep body line, the material bunches up and creates wrinkles or "fingers." This usually happens near the end of the panel when you're almost done.
What NOT to Do:
Don't pull straight down with your squeegee
Don't squeegee at 45 degrees
Don't try to force wrinkles out by pushing hard
Don't rush the edges — going too fast creates permanent creases
The Right Technique:
Think shallow angle: Use a very small angle, around 5 to 10 degrees
Go side to side: You're "knifing" the vinyl in, NOT pushing downward
Go slowly: Speed causes wrinkles
Hold slight tension: Gently guide the vinyl while keeping it smooth
Add heat if needed: Light heat softens the vinyl so it lays down cleanly
Use wrap gloves: Better control on edges
Video Tutorial:
Key Tip: By moving slowly side to side, the wrinkles won't form on the edge or underneath the vinyl. This makes it last longer and look clean and factory-smooth.
💧
Preventing Bubbles
Simple tips to keep your wrap smooth and bubble free
ℹ
Why Bubbles Happen: Bubbles appear when the vinyl isn't fully pressed onto the surface. They often show up the next day or when the car hits the sun because trapped air expands.
The Main Causes:
Not enough pressure:
Beginners often squeegee too softly. Light pressure leaves tiny air pockets that later turn into bubbles.
Using only your hands:
Finger pressure isn't even. A wrap glove feels nice, but it doesn't apply consistent force like a real squeegee.
Missing squeegee strokes:
You must overlap each stroke. If you skip even a thin strip, you leave behind a hidden air channel.
Skipping post-heat:
Post-heating warms the vinyl, makes it expand, and reveals hidden bubbles. This is your chance to fix them before they become permanent.
What Good Technique Looks Like:
Use firm, consistent pressure
Overlap every squeegee stroke (think: brick-laying pattern)
Use your hands only in valleys and only with even pressure
After installation, lightly heat the panel to reveal any bubbles
Push bubbles out or lift and reset the vinyl while it's still warm
Video Tutorial:
Why This Matters: Proper squeegee pressure and post-heating make your wrap last longer, look cleaner, and prevent bubbles from appearing days later.
🌡️
Temperature Issues
Why the weather matters more than you think
ℹ
Why Temp Matters: Vinyl behaves differently depending on how hot or cold it is. Too cold makes it brittle and hard to stick. Too hot makes it overly stretchy and hard to control.
What Happens When It's Too Cold:
Vinyl becomes stiff and brittle
It tears or cracks easily
It won't stretch cleanly
The car's metal surface stays cold, so the vinyl struggles to stick
Cold weather wrapping is not recommended. Gloss films get brittle the fastest.
What Happens When It's Too Hot:
Vinyl gets gummy and overly soft
It stretches even when you don't want it to
Shapes deform easily, creating warped or uneven spots
The constant heat keeps the vinyl from snapping back to its original memory
Harder to control because everything is warm all the time
This makes clean installs MUCH harder.
The Sweet Spot:
65°F to 80°F (18°C to 27°C)
85°F is workable but not ideal.
Why This Range Works:
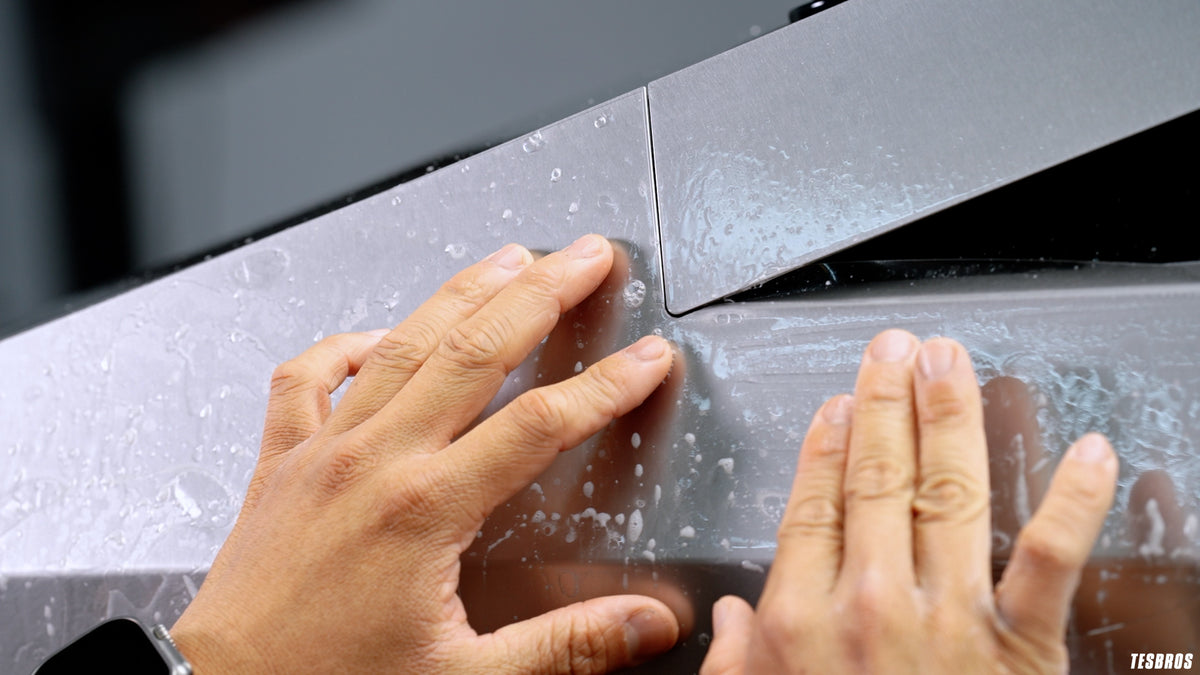
Vinyl stretches only when you choose to stretch it
You have full control using heat gun, not the sun
Adhesion is strong and consistent
No cracking or accidental overstretching
Video Tutorial:
Bottom Line: The right temperature makes wrapping smoother, easier, and more professional-looking. For the best results, always work in a comfortable room-temp environment.
🧽
Squeegee Techniques
How to get clean, bubble-free installs
Use the Right Squeegee:
Don't reuse old, damaged, or dirty squeegees
Replace the felt often (or use a new squeegee for every major job)
If you drop it on the ground, swap it out immediately
A fresh edge gives you smoother glide and fewer scratches.
How to Hold the Squeegee:
Use all four fingers along the back for stability
Use your thumb to anchor your grip
Avoid gripping with two fingers — it causes uneven pressure
The Best Angles:
45 degrees is the most common working angle
60 and 90 degrees are used occasionally depending on pressure needed
The goal is a smooth, controlled glide
Push vs. Pull Technique:
Use PUSH for most of the install:
You can see wrinkles or fingers forming as you go
You can "read" the vinyl and react in real time
Use PULL only on final edges:
When everything is flat and glassed out
Helps apply more force when finishing edges
The Secret to Clean Installs: OVERLAP
Never squeegee in separate, spaced-out passes
Each stroke must overlap the previous one
Overlap prevents air tracks and surprise bubbles
Think of it like laying down bricks side by side
You can practice this by drawing angled lines on scrap vinyl and following them to build muscle memory.
Video Tutorial:
Why This Matters: Proper squeegee technique makes vinyl lay flatter, prevents bubbles, improves durability, and gives you clean, professional-looking results every time.
🔧
Fixing Stubborn Bubbles
At-home method for bubbles that won't flatten
ℹ
Why Big Bubbles Happen: Vinyl was stretched too much during installation, the installer didn't post-heat to kill the vinyl's memory, excess material around edges created tension, or the area wasn't sealed correctly.
The Pro Fix You Can Do at Home:
This method works for old or stubborn bubbles that won't squeegee out.
Use a syringe with a fine angled needle
This lets you release trapped air without making visible holes.
Poke at an angle
You want the needle to slip between the vinyl and air pocket, not down into the paint.
Add light heat
Heat softens the vinyl and helps it settle after the air escapes.
Massage the area
Use a wrap glove or microfiber to gently press the vinyl down over the bubble area.
Trim excess material if needed
Too much extra vinyl around handles or corners can trap air and lift over time.
Repeat for remaining bubbles
Large bubbles may need more than one release point.
Post-heat the area
Use high heat to mimic sun exposure. If the vinyl stays flat while hot, it will stay flat long-term.
Video Tutorial:
Why This Works: The needle gives the trapped air a way out, heat expands the vinyl revealing hidden bubbles, and post-heat locks the vinyl in place so the bubble doesn't return.
When This Won't Work: If the vinyl is extremely overstretched, the adhesive has fully failed, or the panel was wrapped incorrectly from the start. In those rare cases, rewrapping the section is the only fix.
Frequently Asked Questions
How long does installation take?
Most interior pieces can be installed in 30 minutes to 2 hours, depending on complexity and your experience level.
Do I need to remove trim pieces?
Some installations require trim removal for best results. Check the specific video guide for your product.
Will this damage my interior?
No, when properly removed, our products will not damage interior surfaces. Always remove slowly and carefully.
How do I clean wrapped interior surfaces?
Use a damp microfiber cloth with mild cleaner. Avoid harsh chemicals and excessive water.
Need Replacements?
Damaged or defective materials? Request replacement parts.
Please see the guide below to see which center console you have. 1.0 (2017-2020): The 1.0 features a 3 piece center console that flips up in the middle.
2.0 (2020-Present): The 2.0 features a 2 piece center console with a sliding door.
Search Products


One or more of the items in your cart is a recurring or deferred purchase. By continuing, I agree to the cancellation policy and authorize you to charge my payment method at the prices, frequency and dates listed on this page until my order is fulfilled or I cancel, if permitted.